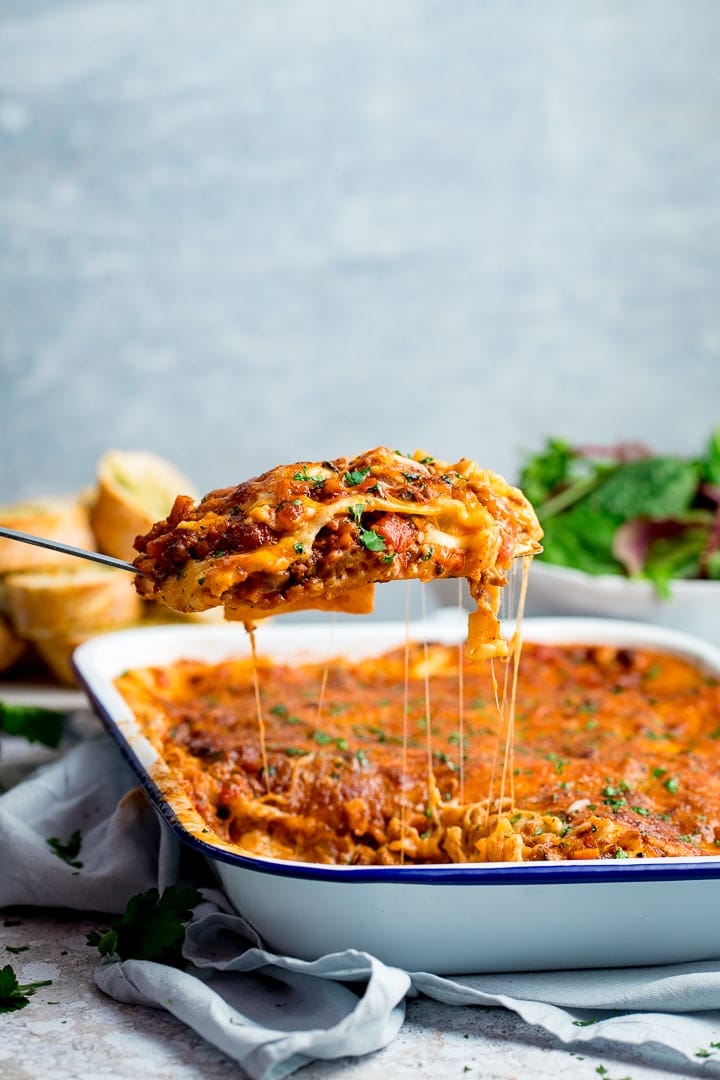
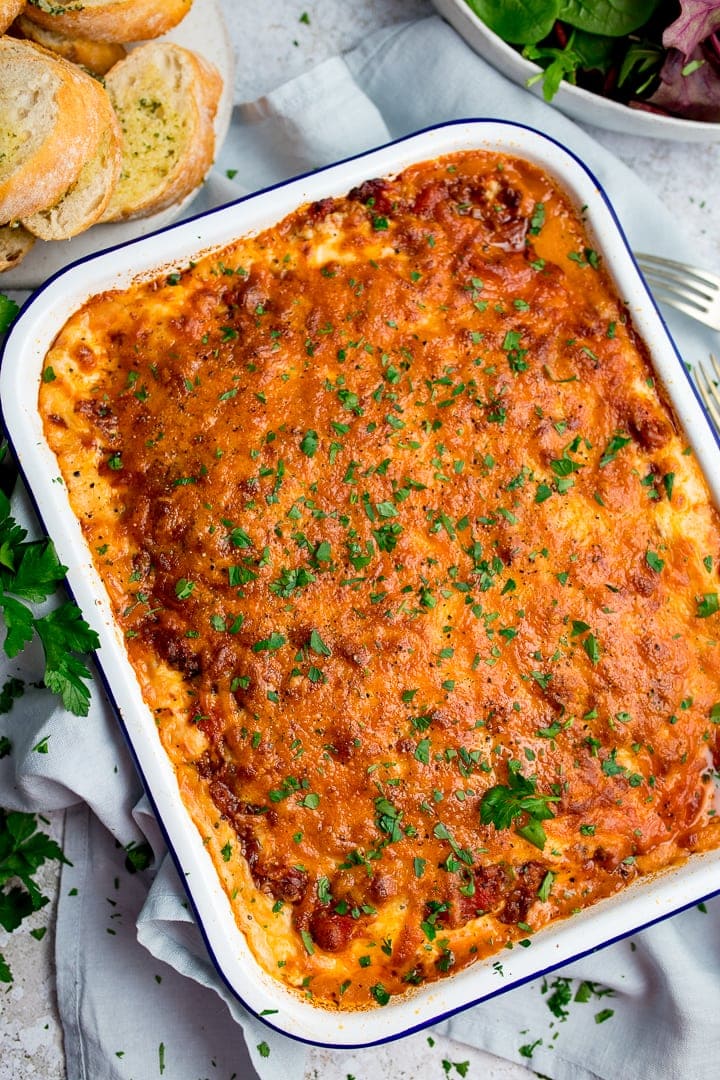
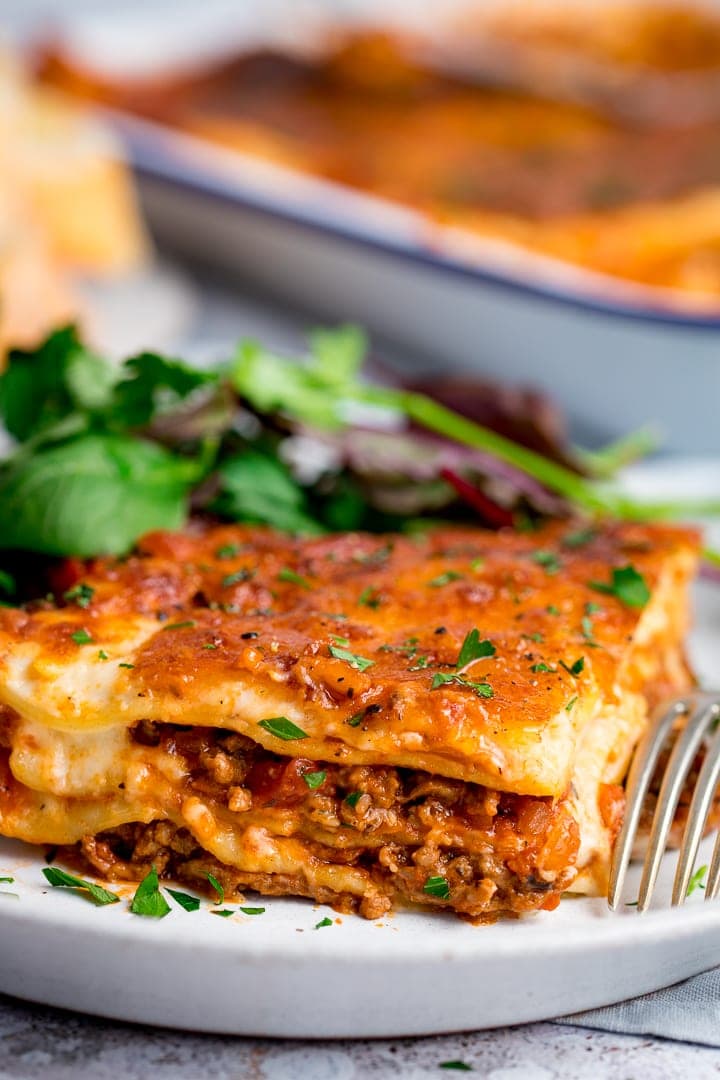
One hour from start-to-finish (and half of that’s in the oven) and you can be serving up a big meaty-cheesy dish of lasagne, with enough for second helpings. Because we all want second helpings when it comes to lasagne right? Serve it with a big salad (I LOVE sliced red onions, crisp lettuce and some crunchy sliced radishes in my side salad) and some buttery garlic bread. Ah. Dinner heaven.
🔪 How to make Lasagne
To make a classic lasagne we’ve got 3 key stages; Lasagna actually the singular form of lasagne. So you’d have one sheet of lasagna, but many would make up the dish lasagne. Many countries, including the USA use lasagna as the spelling for the whole dish though (whereas the UK spell it lasagne). ✔️ Make the Ragu✔️ Make the Béchamel Sauce✔️ Assemble and Bake And I’m going to break down all 3 stages for you here, starting with the ragu.
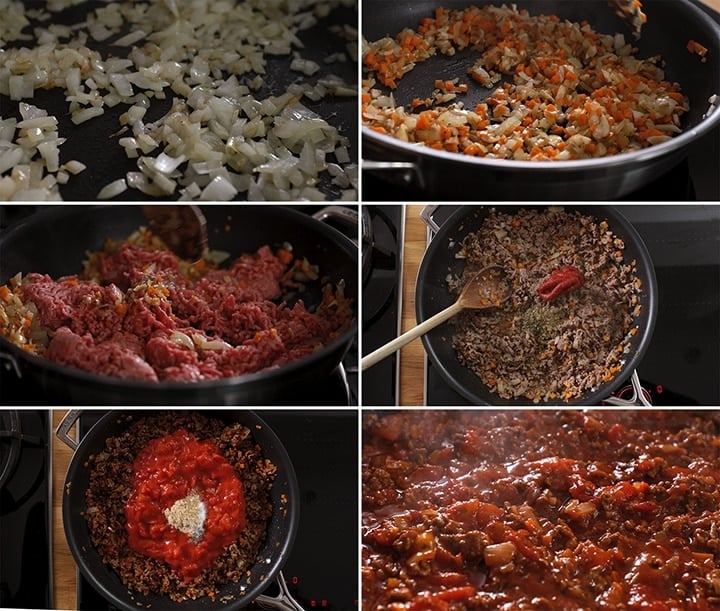
1. The Beef Ragu
For a classic beef lasagne, we’re going to start by making the beef ragu. This is very similar to my Spaghetti Bolognese recipe, so if you have some leftovers of that in the freezer (like I often do) then you could save yourself a bit of time. We start by frying onion in a pan with a little oil. Add garlic, carrot and finely chopped mushrooms (this bulks out the dish and adds flavour). Once softened, add in the minced beef and brown in the pan, then add in tomato puree, oregano, thyme, Worcestershire sauce, a crumbled stock cube, tinned tomatoes, a little brown sugar and a good pinch of salt and pepper. Stir, bring to the boil and simmer for 15 minutes while you make the béchamel sauce.
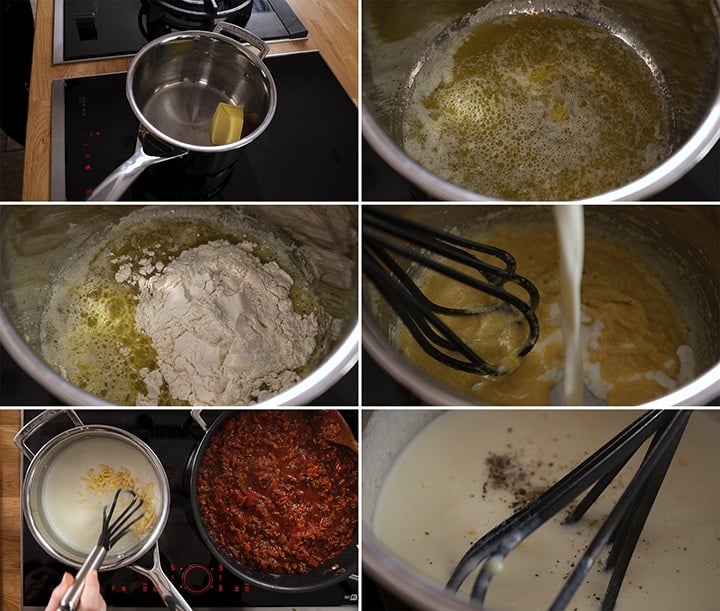
2. Béchamel Sauce (or white sauce)
The white sauce for lasagne is called béchamel sauce. To make the béchamel sauce, melt butter in a saucepan, then stir in flour to form a paste. Slowly stir in milk, and keep stirring (using a hand whisk) over the heat until thickened. Stir in cheese and a pinch of salt and pepper and turn off the heat.
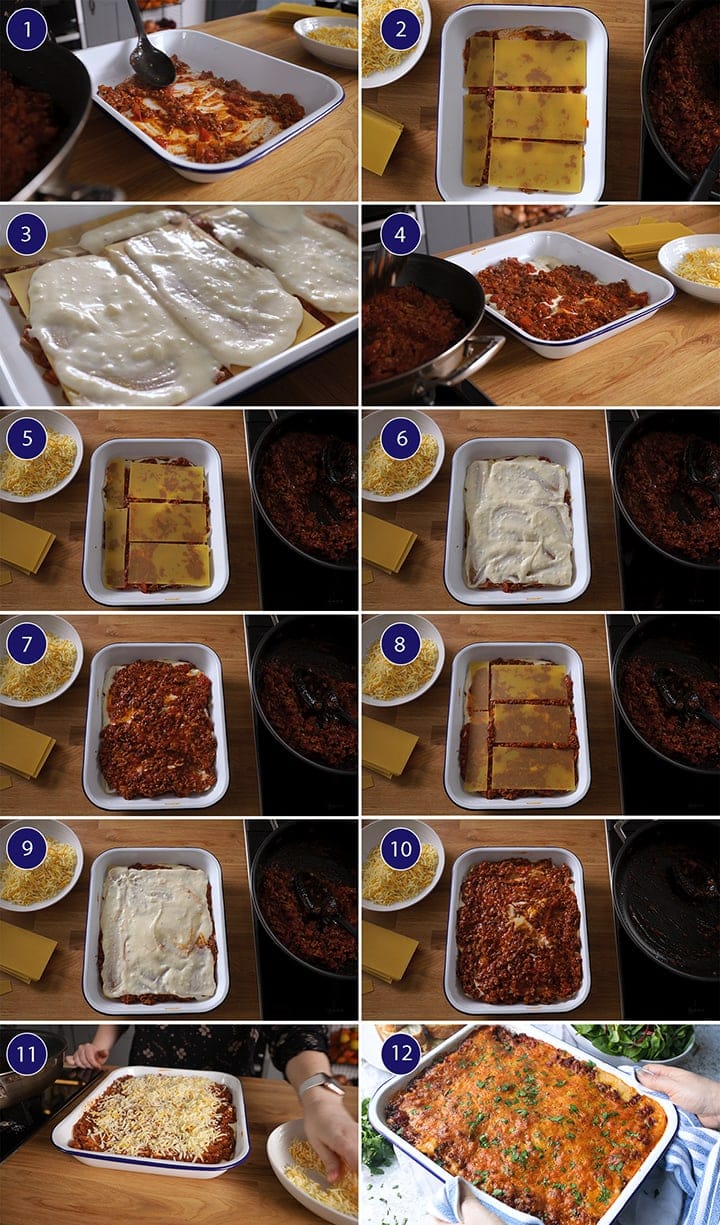
3. Assemble the Lasagne
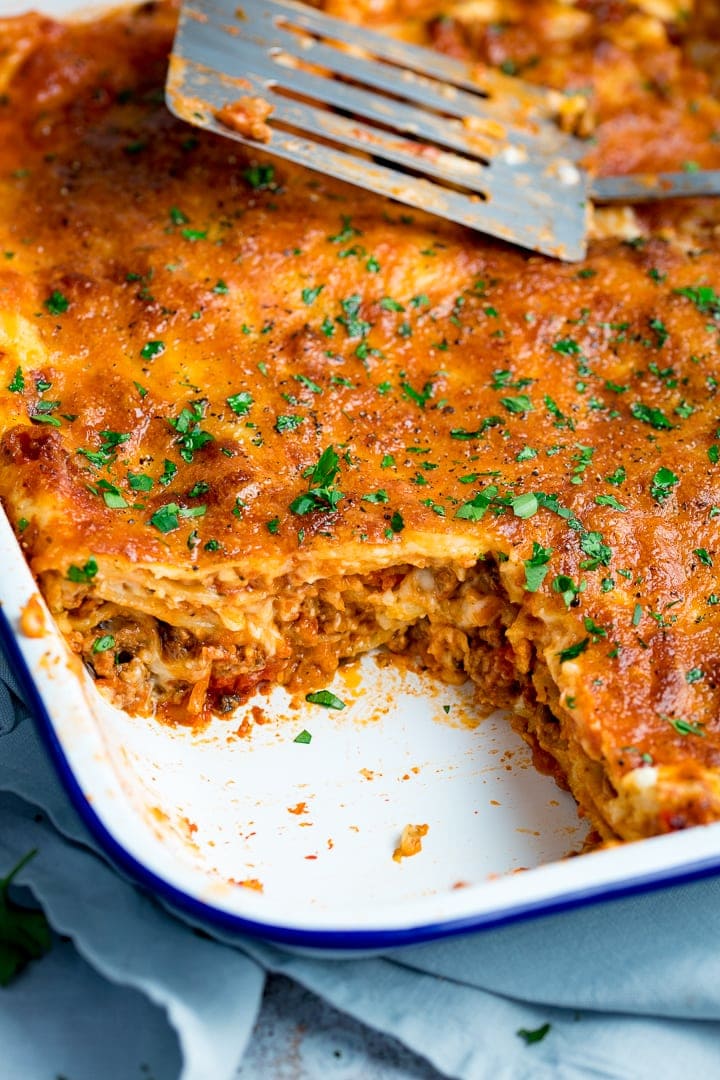
Now take your lasagne dish (mine is a rectangular enamel roaster, approx 31cmx25cm and 5cm deep. Here’s the link enamel roaster (<–affiliate link)). Spread a little of the meat sauce over the base of the dish. You don’t need a lot. It’s just to stop the lasagne sheets from sticking to the base of the dish. Top with lasagne sheets (try not to overlap, but we don’t want big spaces either). Then top with a third of the béchamel, followed by a third of the meat sauce. Repeat twice more - lasagne ->béchamel->meat sauce->lasagne->béchamel->meat sauce. Then sprinkle on the cheese and place in a preheated oven at 200C/400F for 25 - 30 minutes, until the cheese is golden. 👩🍳 PRO TIP - it will take at least 25 minutes until the pasta is cooked in the sauce - so if the top of your lasagne starts looking too brown, place some foil on top. My usual non-blog lasagne is a quick two-layer thrown together thing, that comes out very saucy - i.e you have to spoon it out of the dish. A spatula isn’t going to do it. This one uses three layers of pasta - which is the perfect sauce-to-pasta ratio to get it out neatly. So, if you like extra saucy, kind of messy looking lasagne, go for two layers of pasta (same amount of meat and white sauce). If you like neater lasagne slices, go for three pasta layers. If you like it ridiculously saucy, just go for my lasagne soup (it’s a winner!). 👩🍳PRO TIP if you want your lasagne to look really neat - we’re talking razor-sharp edges here - make it ahead, let it cool completely, refrigerate it, then reheat it. During that time the pasta will soak up more liquid, leaving you with a sharp finish. I didn’t do this, because, well I couldn’t wait and I wanted to eat it.
🍽️ Serving Suggestions
Salad is always a winner - I like a simple salad of thinly sliced red onions, crisp lettuce and some crunchy sliced radishes, but if you want something a little more fancy, how about this cobb salad? No-one’s going to refuse garlic bread! or if you want an upgrade, try my homemade cheese and tomato garlic bread. Fries! Again, shop-bought are good, but for something special how about homemade veggie matchstick fries or chilli and garlic oven fries? Or you could also serve it with some sauteed potatoes
📺 Watch How To Make It
Stay updated with new recipes!Subscribe to the newsletter to hear when I post a new recipe. I’m also on YouTube (new videos every week) and Instagram (behind-the-scenes stories & beautiful food photos). This post was published in Nov 2019. Updated Oct 2020 with additional tips and for housekeeping reasons. Some of the links in this post may be affiliate links – which means if you buy the product I get a small commission (at no extra cost to you). If you do buy, then thank you! That’s what helps us to keep Kitchen Sanctuary running. The nutritional information provided is approximate and can vary depending on several factors. For more information please see our Terms & Conditions.


